Scroll to top
Follow Us
—
Fb.
Ig.
Tw.
Lk.
Dr.
Be.
Skip to content
Home
About
Works
Blog
Careers
Services
Websites
Web & Mobile Apps
Design & Branding
Presence & Advertising
Contact Us
Home
About
Works
Blog
Careers
Services
Websites
Web & Mobile Apps
Design & Branding
Presence & Advertising
Contact Us
© 2023, The Web People.
All rights reserved.
Follow Us
—
Fb.
Ig.
Tw.
Lk.
Dr.
Be.
Let’s Talk
Home
About
Works
Blog
Careers
Services
Websites
Web & Mobile Apps
Design & Branding
Presence & Advertising
Contact Us
Get In Touch
3rd Floor, GL Trade Centre, Main Road, Bolwar, Puttur
hello@thewebpeople.in
Ph: +91 89047 94295
Work Inquiries
hello@thewebpeople.in
Ph: +91 89047 94295
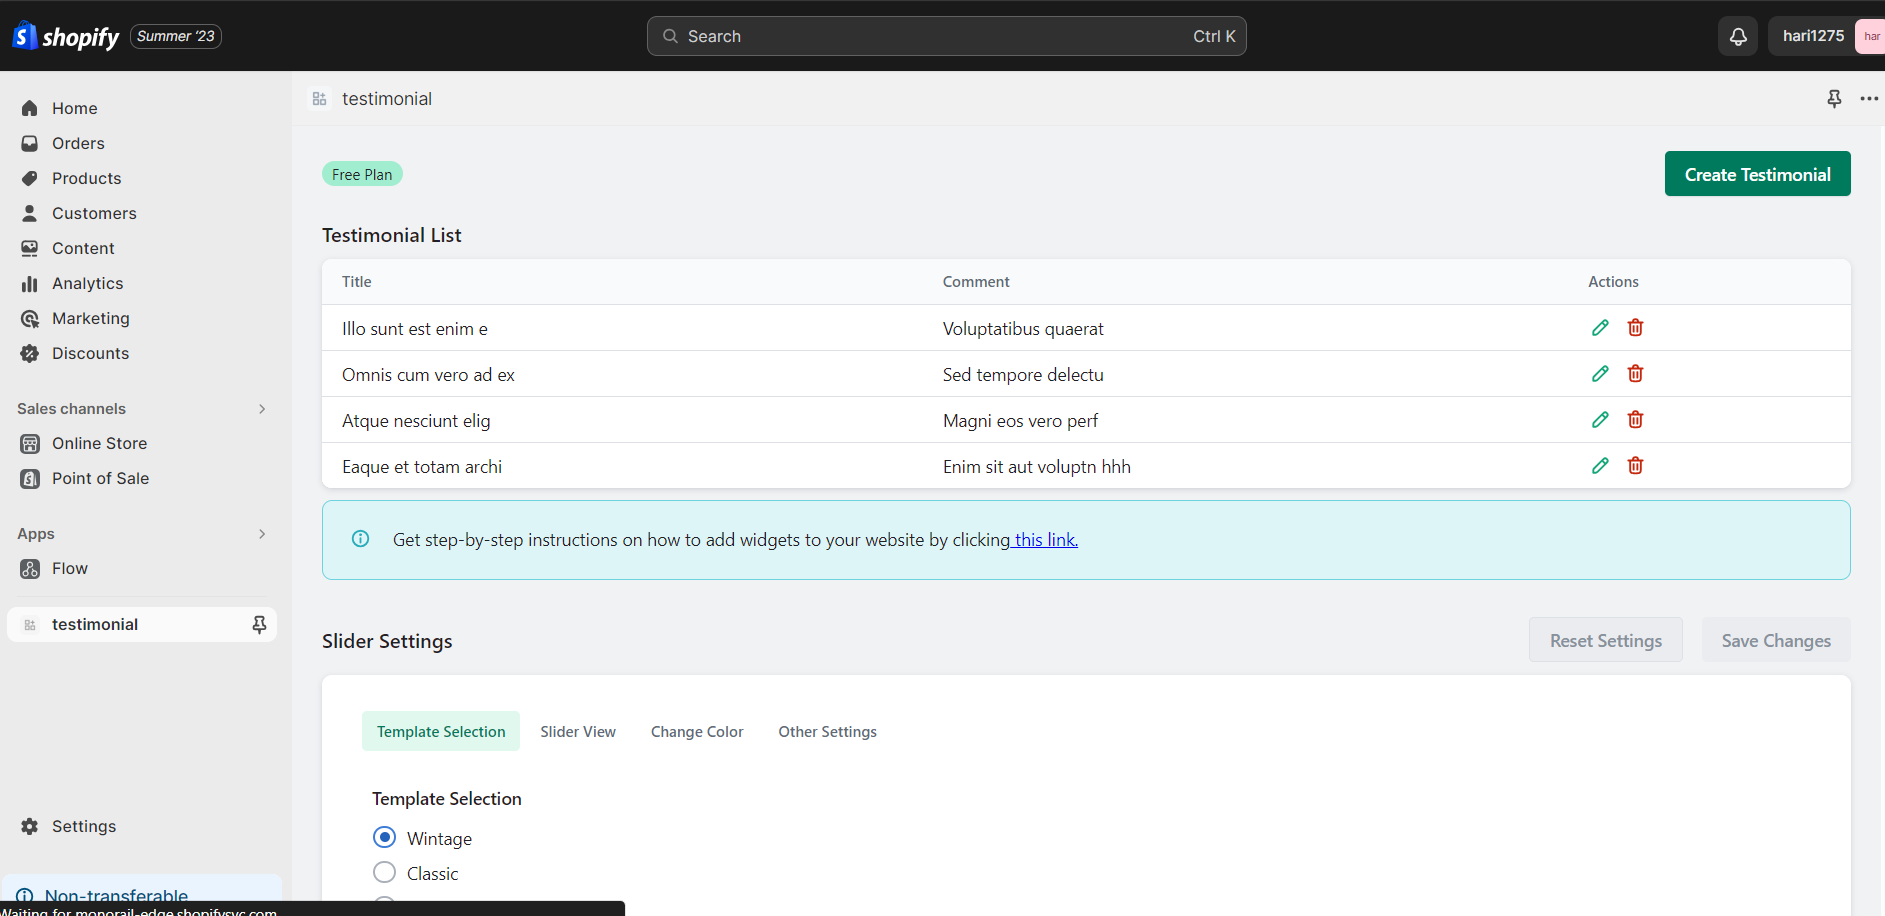
How To Install Testimonials Widget on Shopify Theme 2.0
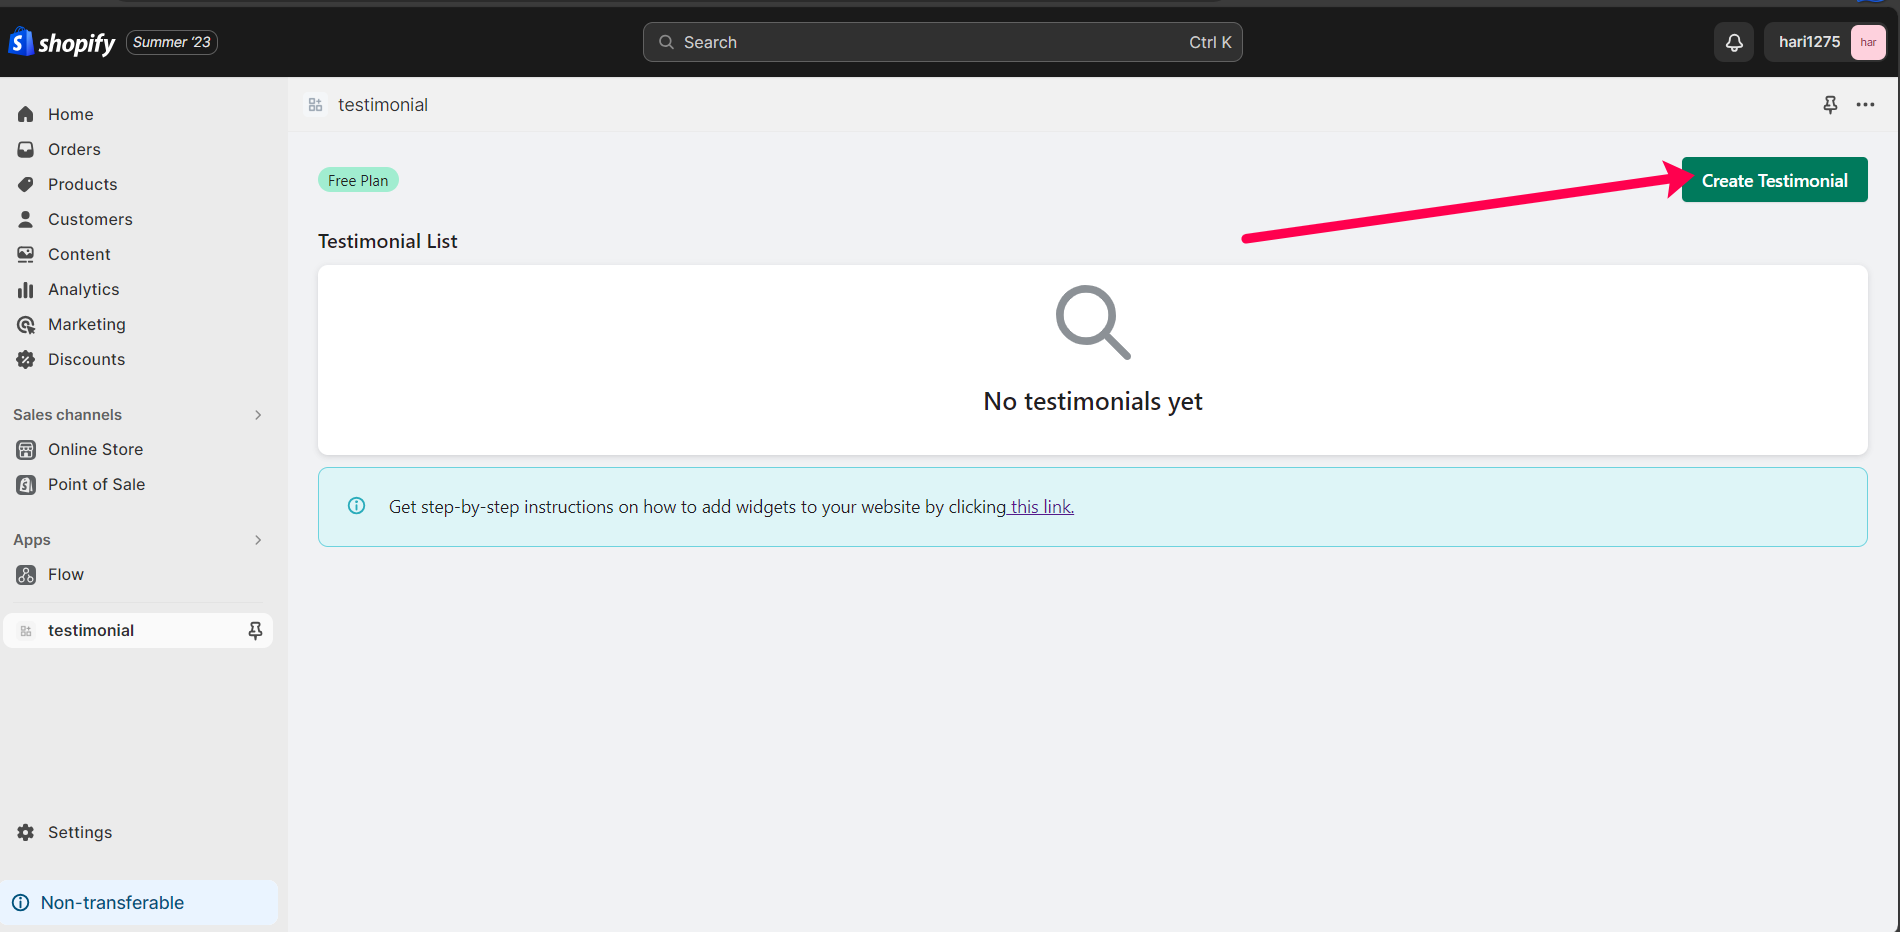
Step 1
Please click "Create Testimonial" button to create a testimonial.
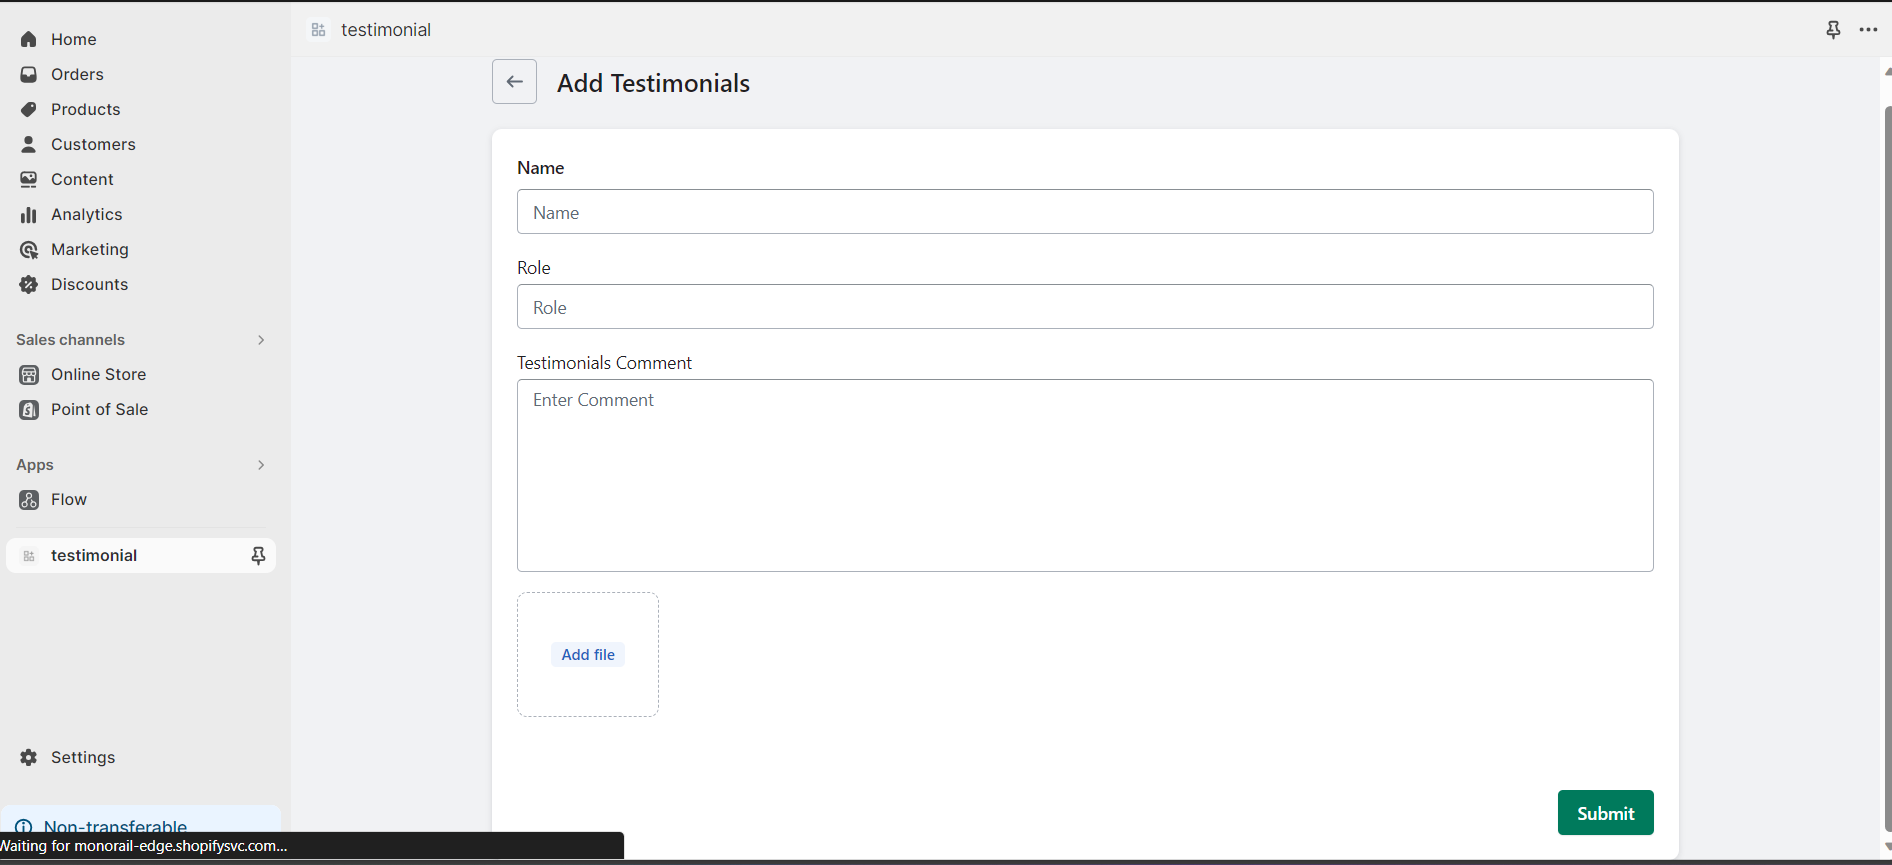
Step 2
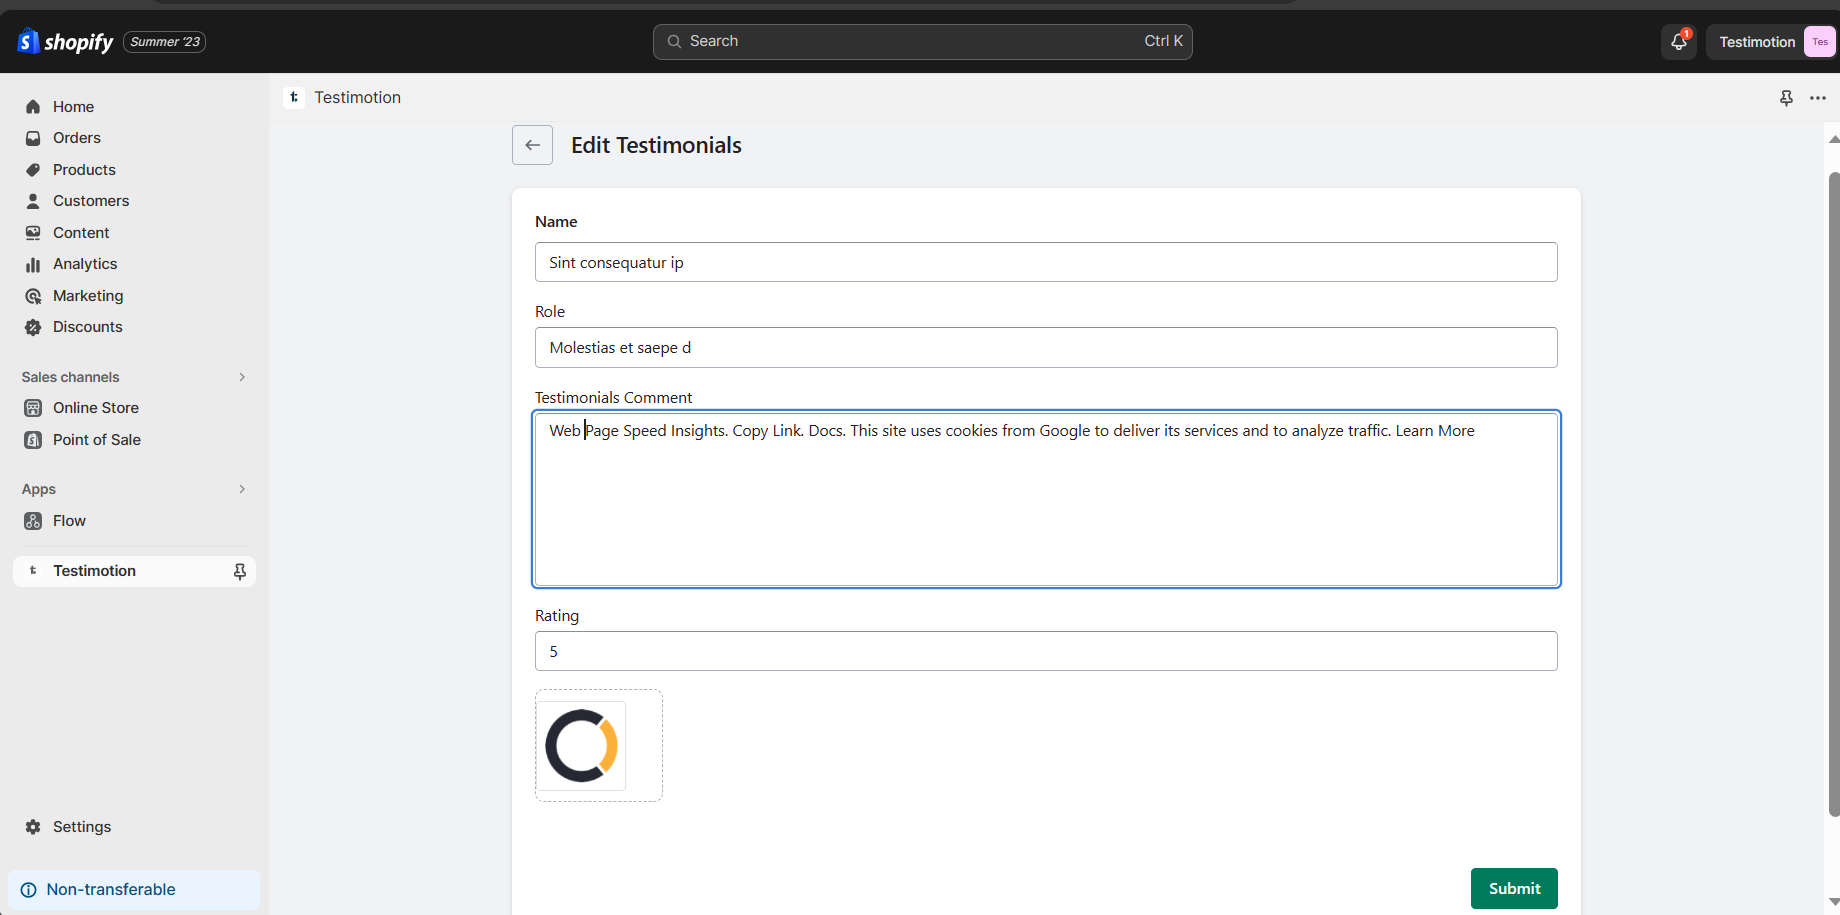
To start, kindly initiate the creation of a new testimonial by adding your content.
Step 3
The dashboard displays a table of all testimonials, allowing users to edit, delete, or create new ones.
Step 4
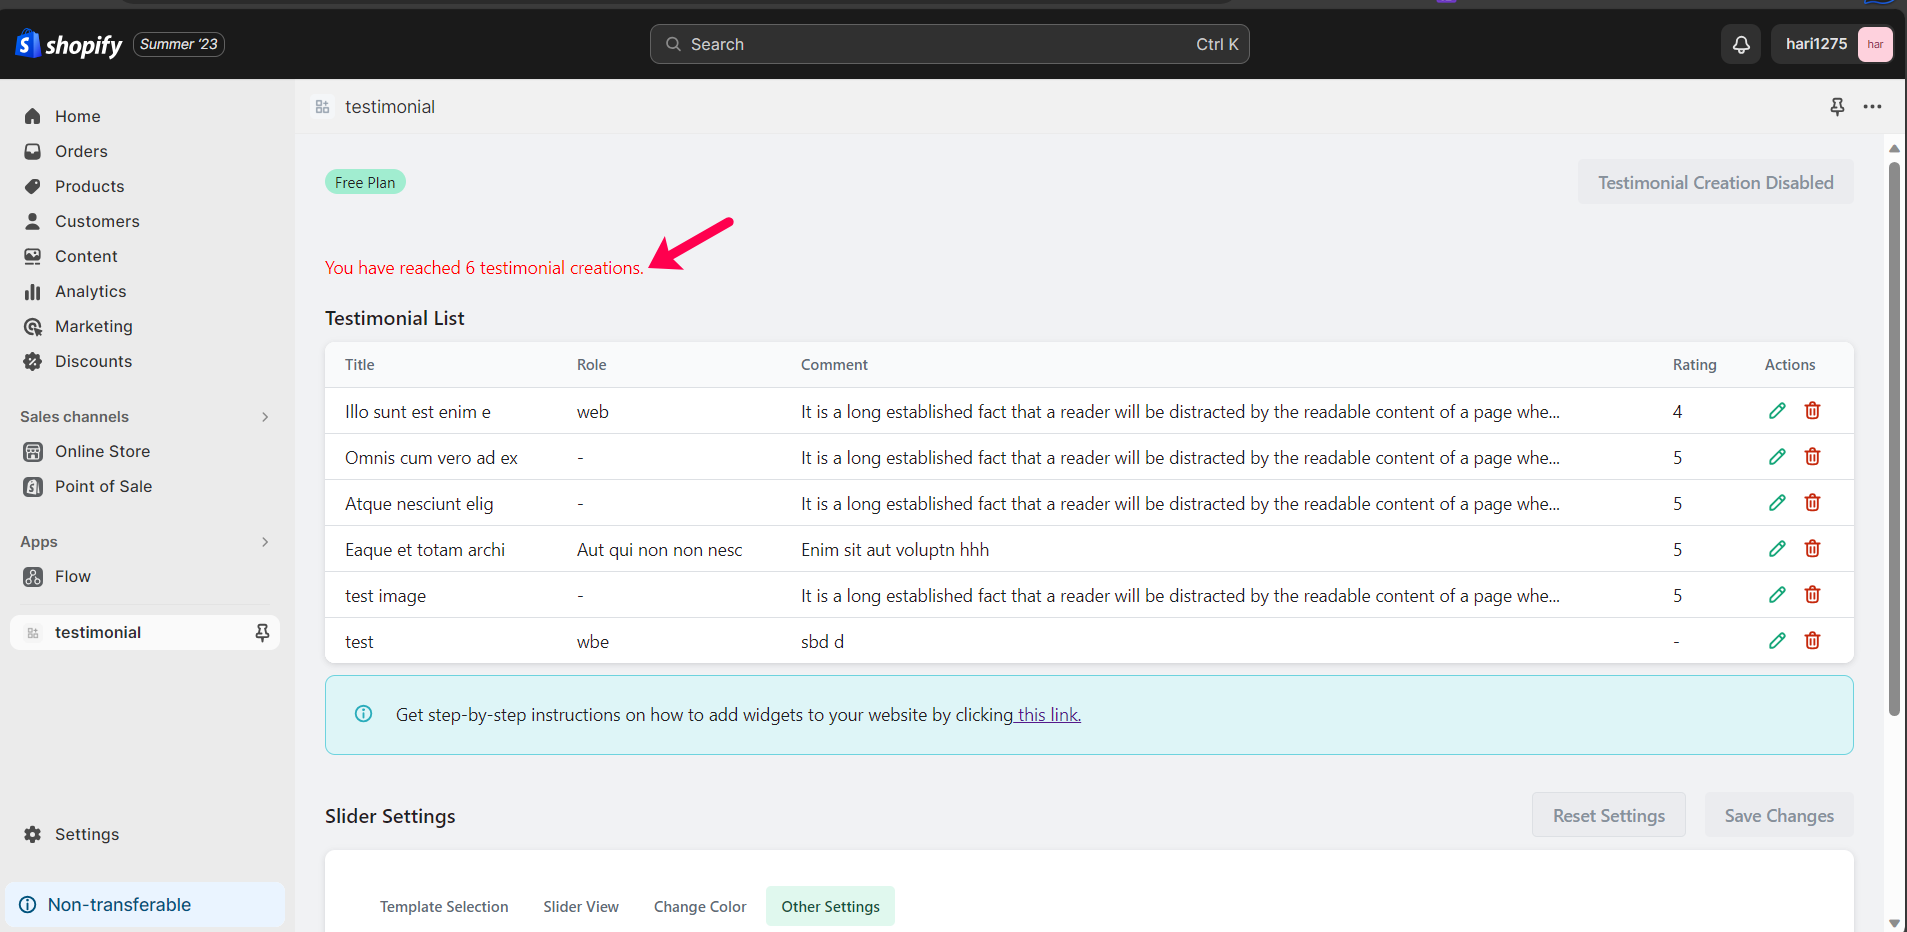
The table presents a list of testimonials, and once it reaches six testimonials, we will no longer accept additional ones.
Step 5
You can edit a specific testimonial by clicking on the corresponding edit symbol in the testimonial table list.
Step 6
You can delete a specific testimonial by clicking on the corresponding delete symbol in the testimonial table list.
Step 7
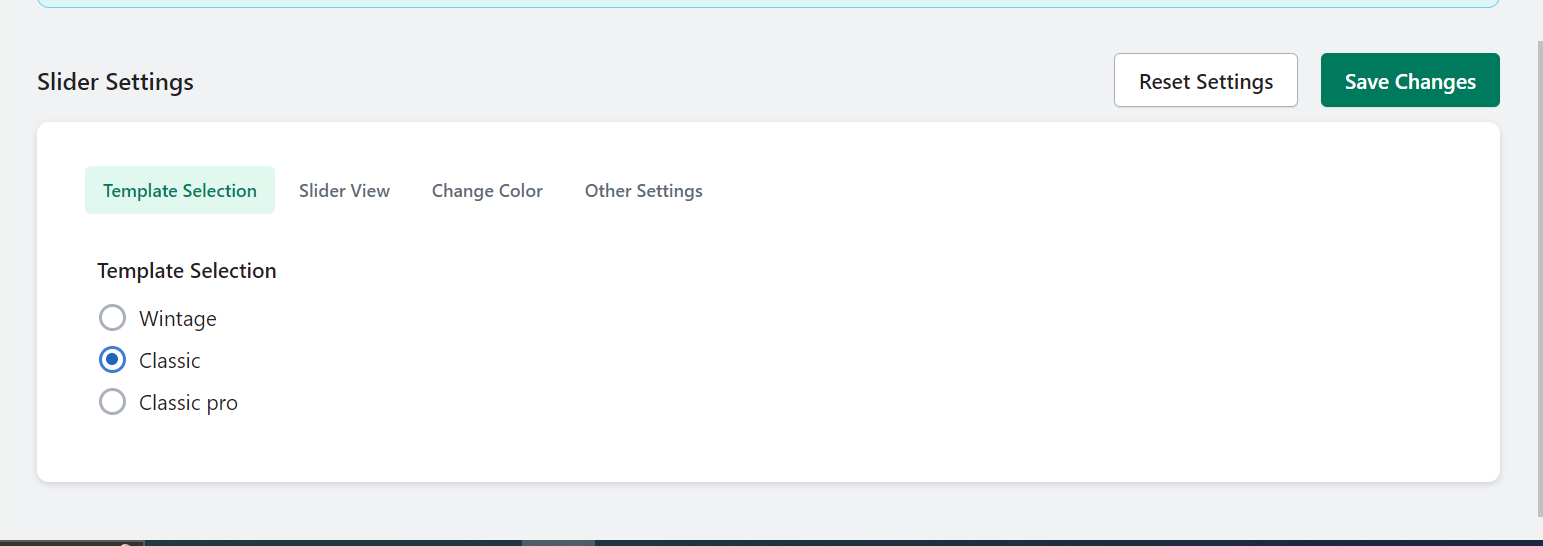
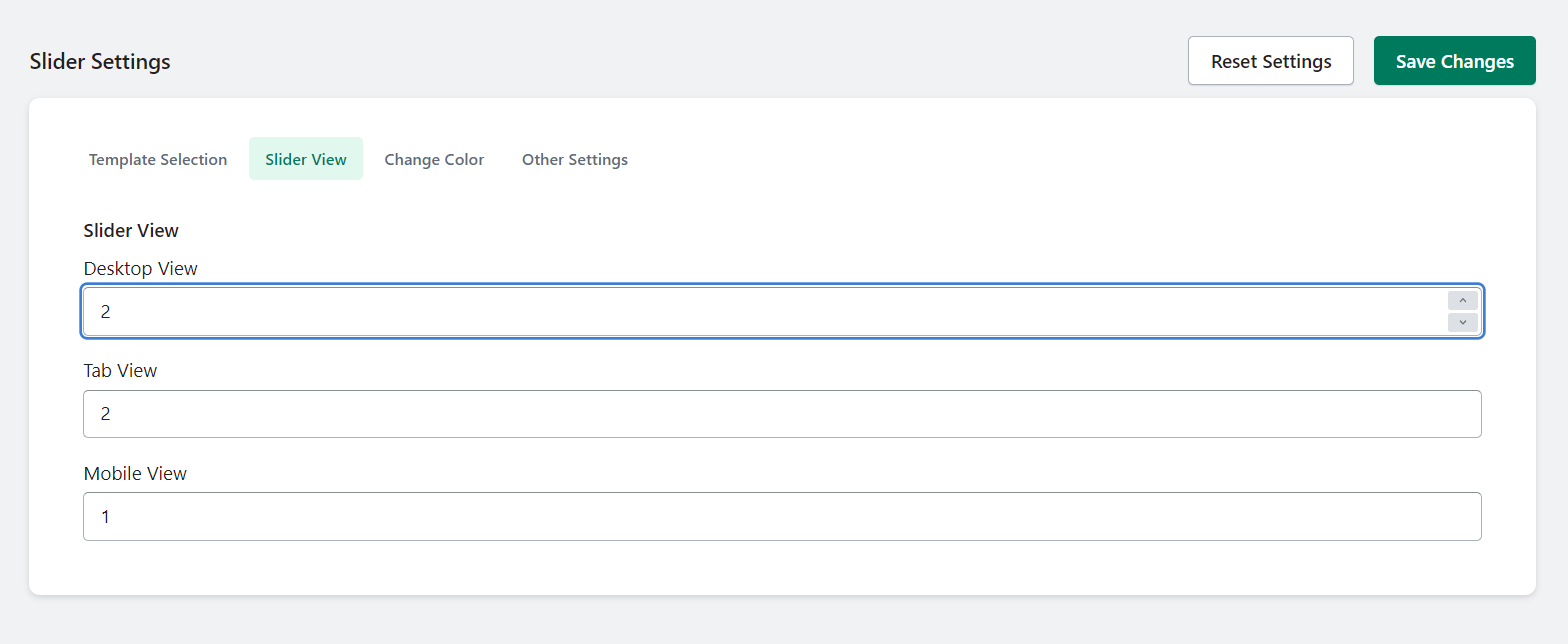
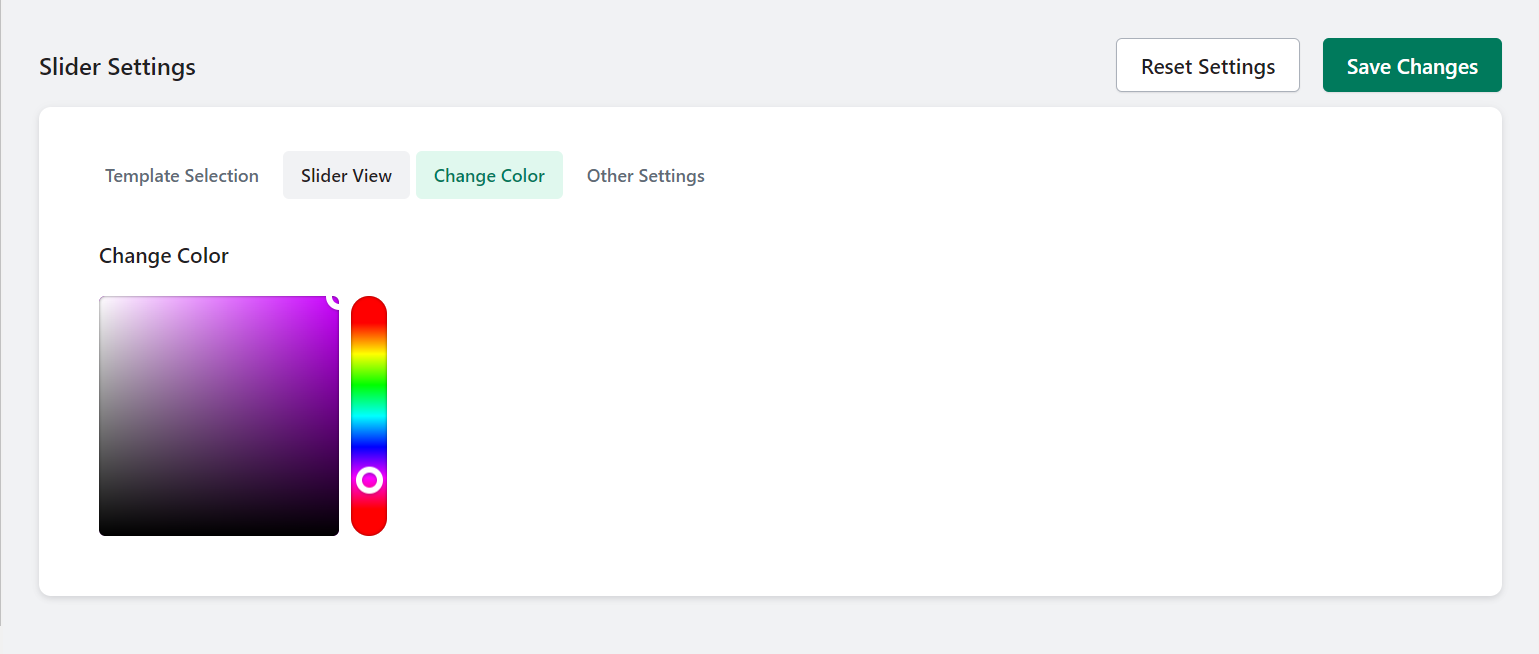
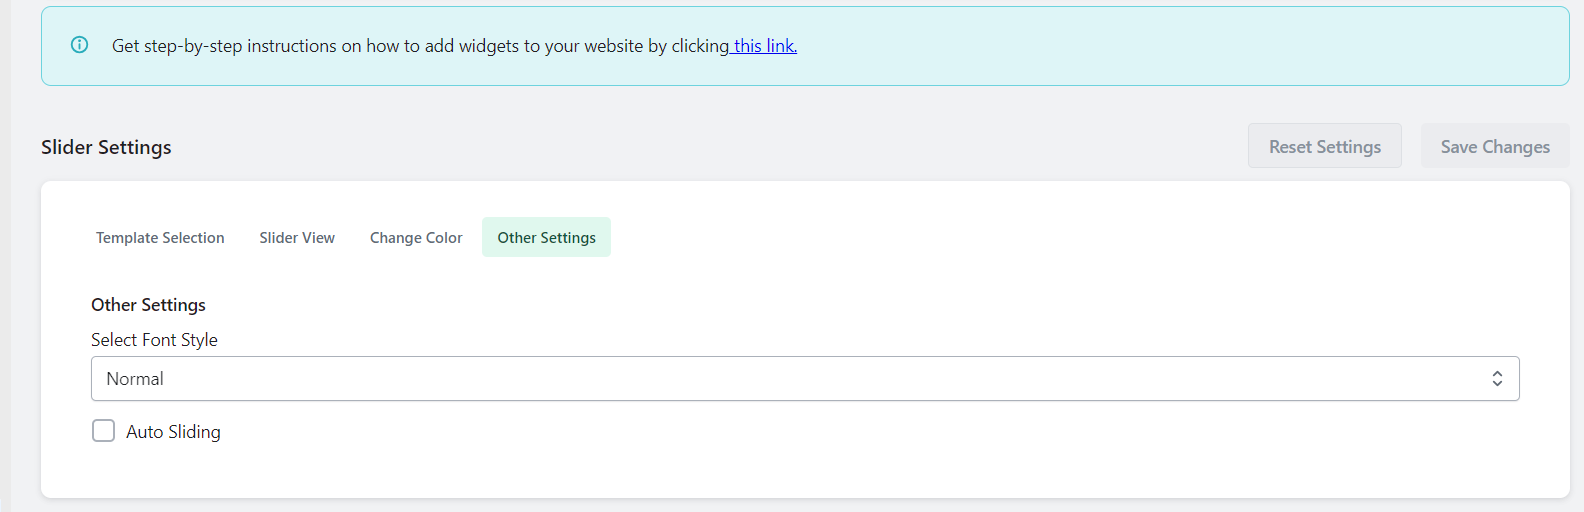
To customize your settings:
◉ Navigate to the "Settings" section.
◉ Personalize your color scheme, font styles, and select from a variety of testimonial templates.
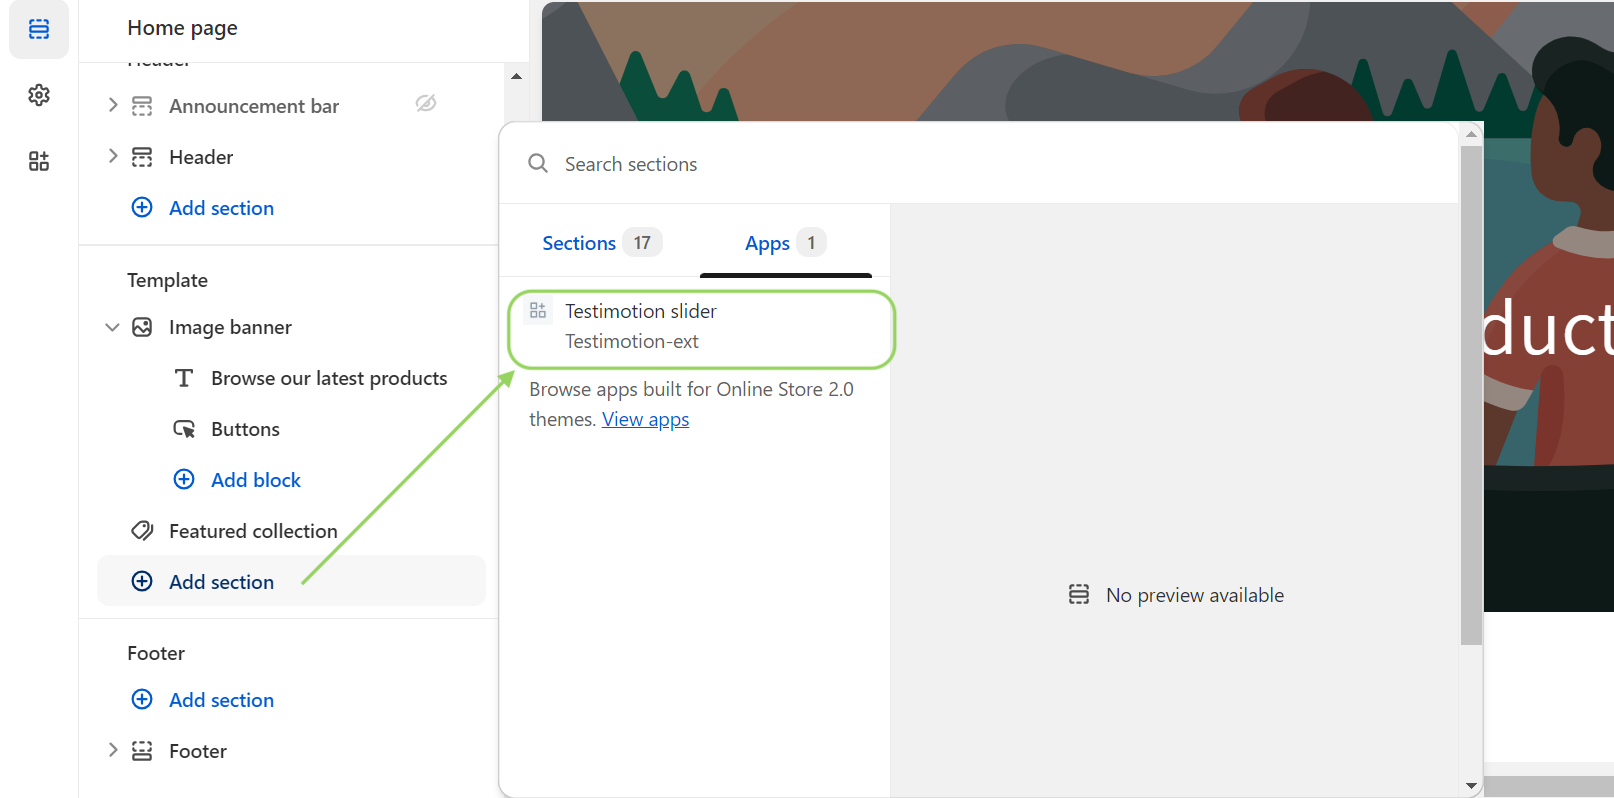
Step 8
Access the "Apps" section, click "Add block," and select your preferred widget layout, such as the "Testimotion Slider."
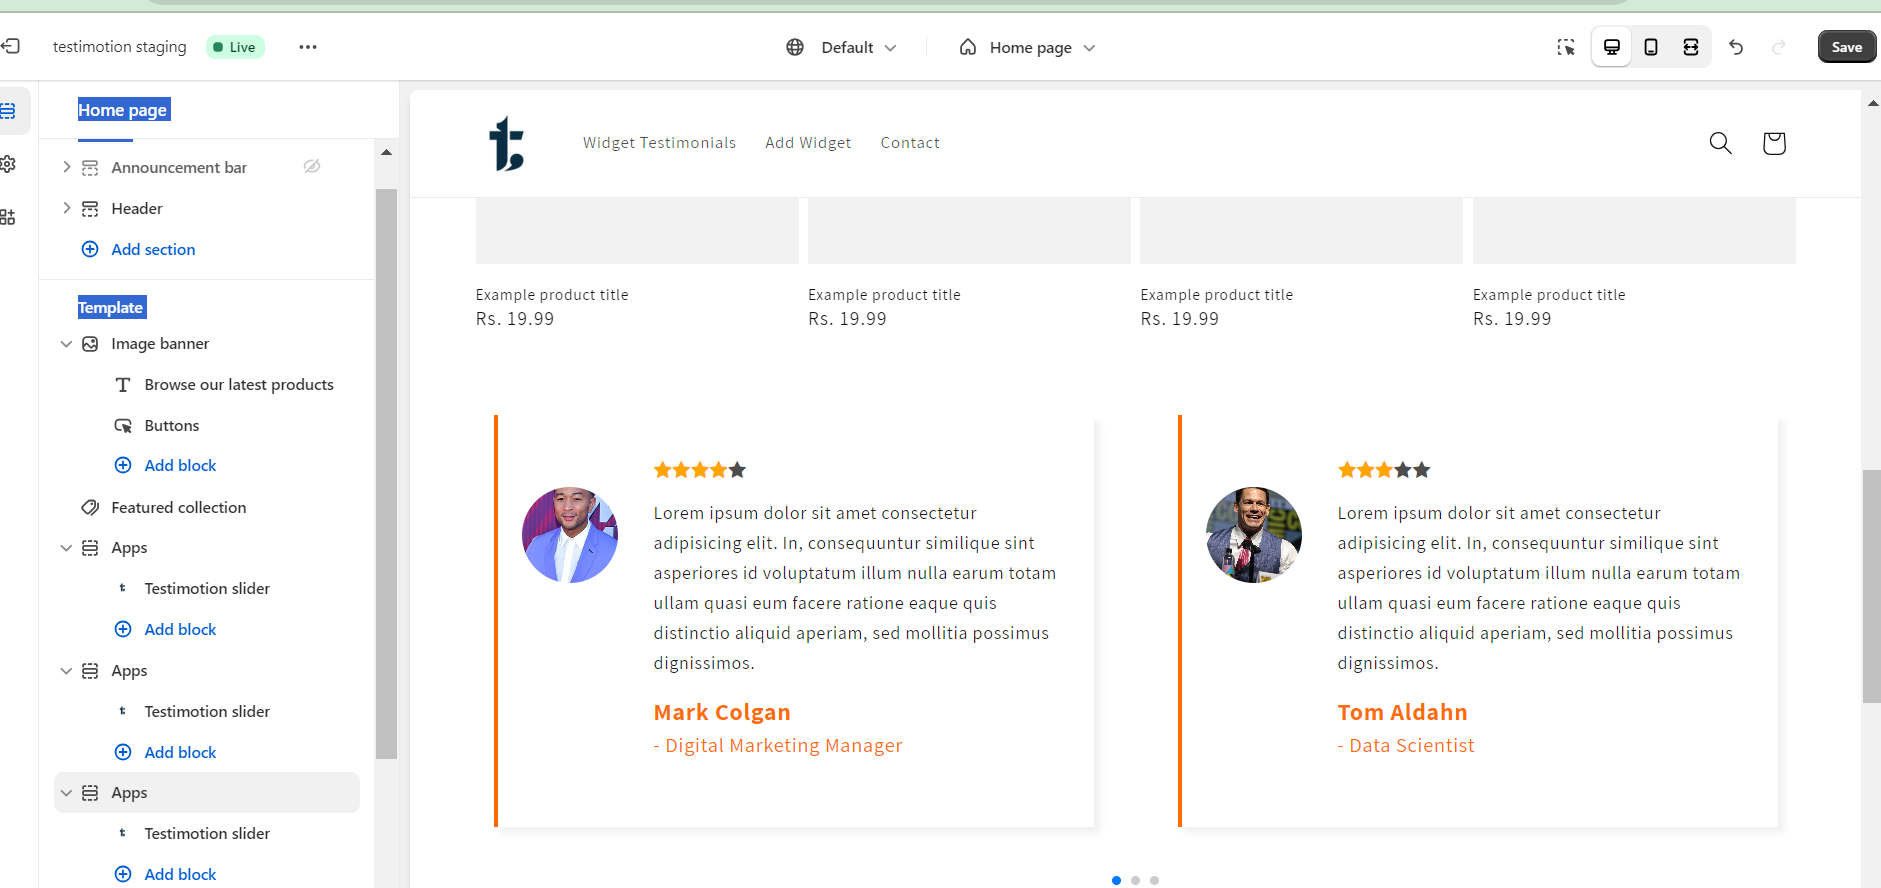
Step 9
After adding it, preview the Testimotion Slider.
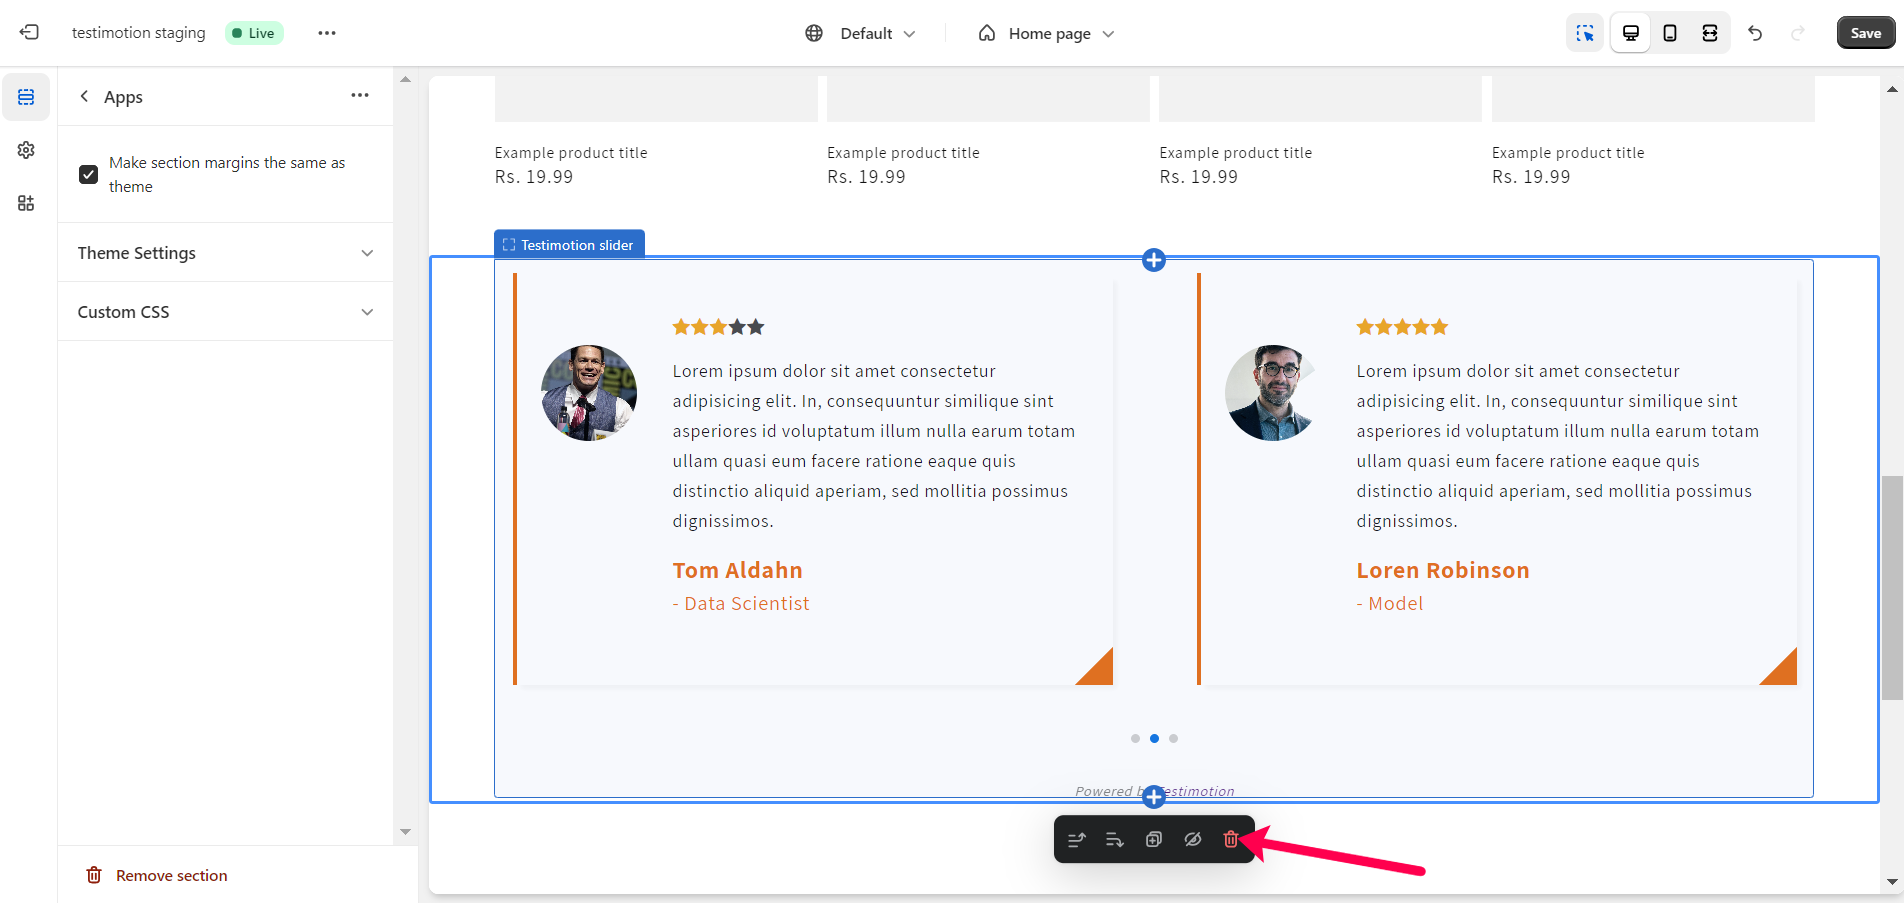
Step 10
You can also remove the slider by clicking the delete icon.